Air Fryer Bread – The Ultimate Guide to Fluffy, Golden Homemade Bread in Your Air Fryer
Introduction – Why Air Fryer Bread Is Changing Home Baking Forever
For generations, bread has held a special place in every cuisine. Whether it’s a rustic country loaf, a baguette with a crackling crust, or a soft sandwich bread meant to cradle creamy butter and homemade jam, bread embodies comfort, tradition, and nourishment. But in a world where modern cooking technology evolves at lightning speed, the art of making homemade bread has undergone a remarkable transformation. Enter the air fryer—a compact, efficient, game-changing appliance that has found its way into millions of kitchens. While most people first use their air fryer for fries, chicken wings, or crispy vegetables, its potential goes far beyond quick snacks. One of the most surprising and rewarding things you can make in it is homemade bread.
Air fryer bread is not just a trend—it is a practical method that offers speed, consistency, and impressive results. For people who love fresh bread but dislike the long wait and uneven baking associated with traditional ovens, the air fryer provides a revolutionary solution. It creates a perfectly golden crust while keeping the interior soft and fluffy. And because it heats quickly and uses less energy, it is ideal for small batches or quick weekday baking.
In this article, we will dive deep into everything you need to know about making perfect bread in an air fryer. Whether you’re a beginner or a seasoned baker, you’ll find this method refreshingly simple and incredibly satisfying. We will explore why air fryer bread works so well, how to achieve the ideal texture, the ingredients you’ll need, step-by-step instructions, variations, troubleshooting tips, and finally, a comprehensive recipe that guarantees success every time.
Prepare to discover a whole new way to bake—and fall in love with the aroma of freshly baked bread filling your kitchen in under an hour.
Why Make Bread in an Air Fryer?
Before we get into the recipe, it’s worth understanding why the air fryer is such an excellent tool for baking bread. Many people assume the air fryer is only meant for frying or crisping foods, but the technology behind it is what makes it so versatile.
1. Faster Preheating
Traditional ovens often take 10–15 minutes to preheat, while an air fryer typically reaches temperature in 2–3 minutes. This saves time and energy—perfect for busy home cooks.
2. Even Heat Circulation
The air fryer is essentially a high-powered convection oven. Its rapid air circulation ensures even browning and prevents hot spots, which can sometimes ruin a loaf in a regular oven.
3. Perfect Crust Formation
The compact space and intense airflow help form a beautiful golden crust that resembles artisanal bakery bread.
4. Smaller Batches
Air fryers are ideal when you want a small loaf or individual rolls. If you live alone or don’t want leftovers, this is a big advantage.
5. Energy Efficiency
Because it cooks faster and uses a smaller chamber, the air fryer consumes less electricity than a full-size oven.
6. Ideal for Beginners
If you are new to bread making, the air fryer reduces the margin of error and provides more consistent results.
Understanding the Texture and Science of Air Fryer Bread
Bread baking, whether in a traditional oven or an air fryer, is rooted in simple chemistry. Knowing what happens during each stage helps you become a more confident baker.
Gluten Development
Mixing flour with water starts gluten development, giving bread structure. Kneading enhances elasticity, helping the dough rise beautifully.
Yeast Fermentation
Yeast feeds on sugar and produces carbon dioxide, which causes the dough to rise. Warm environments—like the gently warmed interior of an air fryer (turned off)—can speed this up.
Maillard Reaction
The golden crust on bread is due to the Maillard reaction—a chemical reaction between proteins and sugars at high heat. The air fryer’s intense, directed heat enhances this effect.
Moisture Retention
Because the air fryer cooks quickly, it helps retain moisture in the interior, resulting in a soft, tender crumb.
Ingredients Needed for Perfect Air Fryer Bread
Here’s what you’ll need for a standard loaf:
Dry Ingredients
-
2 cups (250 g) all-purpose flour or bread flour
-
1 tablespoon white sugar
-
1 teaspoon salt
-
1 packet (7 g) instant yeast
Wet Ingredients
-
¾ cup warm water (110°F / 43°C)
-
2 tablespoons vegetable oil or olive oil
Optional Enhancers
-
1 tablespoon melted butter (for brushing after baking)
-
Herbs (rosemary, thyme, oregano)
-
Garlic powder
-
Sesame or poppy seeds
-
Honey instead of sugar for enriched flavor
Step-by-Step Instructions: How to Make Air Fryer Bread
Below is the full, detailed, beginner-friendly method. Follow these steps closely for a perfect loaf every time.
Step 1: Activate the Yeast
Even though instant yeast doesn’t technically require proofing, doing it ensures it’s alive and provides better texture.
-
In a bowl, combine warm water, sugar, and yeast.
-
Stir gently.
-
Wait 5–10 minutes until the mixture becomes foamy.
If it doesn’t foam, your yeast is dead—start again with a fresh packet.
Step 2: Mix the Dough
-
In a large mixing bowl, combine flour and salt.
-
Pour in the yeast mixture and oil.
-
Stir with a wooden spoon until a shaggy dough forms.
Step 3: Knead
Kneading develops gluten, making the bread light and airy.
-
Knead on a lightly floured surface for 8–10 minutes.
-
The dough should become smooth, elastic, and slightly tacky but not sticky.
-
If too sticky, add a tablespoon of flour at a time.
-
If too dry, add a teaspoon of water.
Step 4: First Rise
To allow the dough to double in size:
-
Transfer dough to a lightly oiled bowl.
-
Cover with a towel or plastic wrap.
-
Place in a warm area for 45–60 minutes.
Tip:
You can use your air fryer as a proofing box:
-
Heat it EMPTY for 2 minutes at 80°F/27°C.
-
Turn it off.
-
Place the covered dough inside.
Step 5: Shape Your Bread
After the dough has doubled:
-
Punch down the dough to release air.
-
Shape into a round ball or small loaf.
-
Place into a parchment-lined cake pan that fits inside your air fryer.
Step 6: Second Rise (Proofing Again)
Let the dough rise again for 20–30 minutes.
This helps create a lighter texture and a better oven spring.
Step 7: Air Fry the Bread
Time to bake!
Temperature & Duration
-
Preheat air fryer to 350°F (180°C) for 3 minutes.
-
Bake bread for 15–20 minutes.
Check halfway through:
-
If the top browns too quickly, cover lightly with foil and continue cooking.
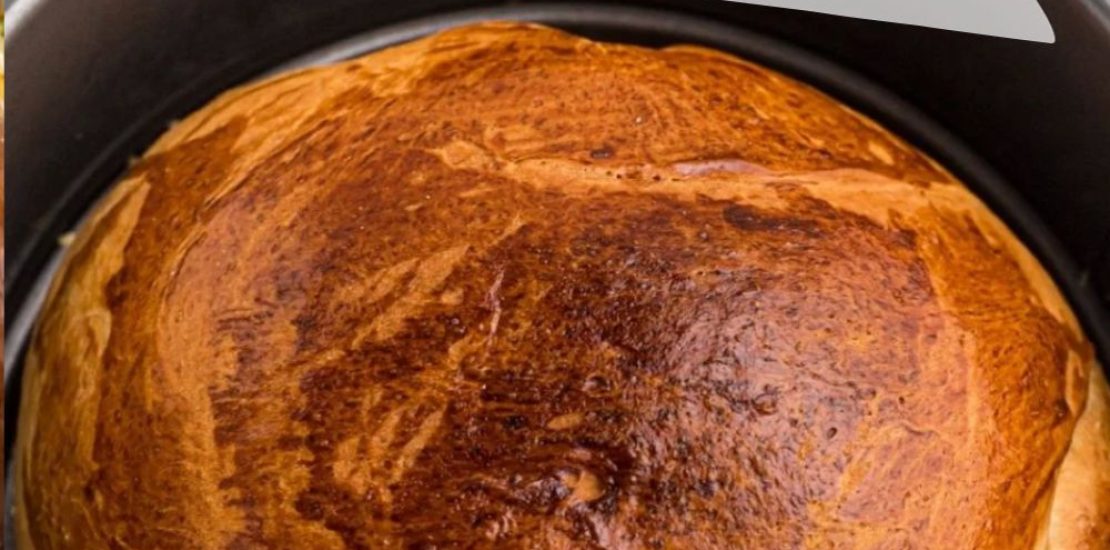
When Is It Done?
-
The top is golden brown.
-
It sounds hollow when tapped.
-
Internal temperature reaches 190–200°F (88–93°C).
Step 8: Cool the Bread Properly
This is one of the most overlooked steps.
-
Remove bread from the pan.
-
Let cool completely on a rack for at least 30–40 minutes.
Cooling allows steam to escape and finishes the internal cooking. Cutting too early results in gummy bread.
Variations: Customize Your Air Fryer Bread
Once you master the basic recipe, the possibilities are endless.
1. Garlic & Herb Bread
Add:
-
1 teaspoon garlic powder
-
1 tablespoon mixed herbs
Brush top with garlic butter after baking.
2. Cheese Bread
Knead in ½ cup shredded cheddar, mozzarella, or parmesan.
3. Honey Wheat Bread
Replace:
-
1 cup all-purpose flour with whole wheat flour
-
Sugar with honey
4. Cinnamon Raisin Bread
Add:
-
1 teaspoon cinnamon
-
⅓ cup raisins
-
2 tablespoons brown sugar
5. Olive Bread
Add chopped olives, herbs, and a drizzle of olive oil.
Troubleshooting: Common Problems & Solutions
Bread not rising?
Bread too dense?
Top burning?
Bottom undercooked?
Here’s how to fix every issue.
1. Bread Didn’t Rise
-
Yeast was expired or water was too hot/cold.
-
Dough didn’t proof long enough.
-
Kitchen was too cold.
Solution: Use warm environment or the air fryer preheat trick.
2. Bread Too Dense
-
Not enough kneading.
-
Too much flour added.
-
Dough underproofed.
Knead until elastic and allow full rising time.
3. Top Browning Too Fast
Cover loosely with foil halfway through cooking.
4. Undercooked Interior
-
Bake longer.
-
Reduce temperature slightly (to 320°F/160°C).
-
Use a smaller pan to allow more airflow.
Serving Suggestions
Fresh bread is incredibly versatile.
Breakfast
-
Toast with butter and jam
-
French toast
-
Egg sandwiches
Lunch
-
Grilled cheese
-
BLT
-
Tuna or chicken salad sandwich
Dinner
-
Serve warm with soups, stews, or pasta
-
Pair with olive oil and balsamic vinegar
-
Make garlic bread
Storage Tips
Room Temperature
Store in airtight container for up to 3 days.
Freezing
-
Wrap tightly in plastic wrap.
-
Store up to 2 months.
Thaw at room temperature and toast lightly before serving.
Full Air Fryer Bread Recipe (Complete Printable Version)
Ingredients
-
2 cups flour
-
1 tbsp sugar
-
1 tsp salt
-
1 packet instant yeast
-
¾ cup warm water
-
2 tbsp oil
-
Butter for brushing (optional)
Instructions
-
Mix warm water, yeast, and sugar. Let foam.
-
Combine flour and salt. Add yeast mixture and oil.
-
Knead for 8–10 minutes.
-
Let rise for 1 hour.
-
Shape and place in pan.
-
Proof again 20–30 minutes.
-
Air fry at 350°F/180°C for 15–20 min.
-
Cool before slicing.
Conclusion – Air Fryer Bread: A Simpler, Faster, Delicious Way to Bake
Air fryer bread is more than a convenience—it represents a new era of home baking where simplicity meets quality. This method allows anyone, regardless of experience or kitchen size, to enjoy fresh, warm, homemade bread with minimal effort and maximum satisfaction. The air fryer’s rapid heat circulation, compact size, and reliability make it a powerful tool for creating bakery-quality bread in less time and with less guesswork than traditional baking.
Whether you’re craving a soft loaf for sandwiches, a fragrant herb bread to accompany dinner, or simply want the joy of freshly baked bread filling your home, the air fryer has you covered. With the detailed instructions and variations provided in this article, you have everything you need to become a confident bread baker.
So grab your ingredients, warm up your air fryer, and enjoy the irresistible aroma of homemade bread made easier than ever.