How to Clean Your Air Fryer: The Ultimate Step-by-Step Guide
Introduction
The air fryer has become a kitchen staple, revolutionizing the way we cook everything from French fries to chicken wings and even baked goods. Its ability to create crispy, golden textures using significantly less oil than traditional frying methods makes it a favorite for health-conscious home cooks. But like any other appliance, the air fryer needs regular cleaning to maintain its performance, hygiene, and longevity.
Whether you use your air fryer daily or just occasionally, food residue, grease, and odors can build up over time. Neglecting proper maintenance can lead to decreased efficiency, unpleasant smells, and even smoking during use. Worse yet, a dirty air fryer can pose serious health risks due to bacteria and burnt food remnants.
In this comprehensive guide, we will walk you through exactly how to clean your air fryer — from daily touch-ups to deep cleans — using common household supplies. You’ll also learn important maintenance tips, how to tackle stubborn grease, and how to clean specific parts like the basket, tray, and heating coil. Let’s dive in!
Section 1: Understanding Your Air Fryer
Before jumping into the cleaning process, it’s important to understand the anatomy of your air fryer. Most air fryers share these main components:
-
Air Fryer Basket: Where food is placed during cooking.
-
Drip Tray or Pan: Catches oil and food particles.
-
Crumb Tray (Optional): Helps with easier cleaning in some models.
-
Heating Coil: Located at the top inside the unit; emits heat.
-
Fan Assembly: Circulates hot air throughout the chamber.
-
Exterior Casing and Controls: The outside shell and buttons or digital display.
Different brands may have additional features (such as dual-drawer models or built-in rotisserie racks), but these are the basics.
Section 2: Why Regular Cleaning Is Essential
Cleaning your air fryer regularly is not just about aesthetics. Here are the top reasons why you should make it a habit:
1. Avoid Off-Flavors
Old grease and food particles can create smoky smells or impart odd flavors to your dishes.
2. Prevent Smoke
Oil residue left inside the basket or heating coil can burn and smoke when the appliance is turned on.
3. Reduce Fire Risk
Built-up grease is a known fire hazard in any cooking appliance.
4. Extend Appliance Lifespan
Regular maintenance ensures your air fryer works efficiently and doesn’t wear out prematurely.
5. Promote Food Safety
Bacteria can grow in leftover food debris and create a health risk if not cleaned properly.
Section 3: What You’ll Need to Clean an Air Fryer
Before you get started, gather the following supplies:
-
Soft sponge or non-abrasive scrub brush
-
Dish soap (degreasing preferred)
-
Microfiber cloth
-
Baking soda (for tough grease)
-
White vinegar (optional, for odors)
-
Toothbrush or soft brush (for tight areas)
-
Wooden or silicone spatula (to dislodge hard bits)
-
Paper towels or drying towel
Avoid steel wool, metal scrubbers, or harsh chemicals, as they can damage non-stick coatings.
Section 4: Step-by-Step Guide to Cleaning Your Air Fryer
Step 1: Unplug and Cool Down
Safety first. Make sure your air fryer is unplugged and completely cooled down before starting the cleaning process.
⚠️ Never clean a hot air fryer. Always wait until it’s safe to touch.
Step 2: Remove and Soak Removable Parts
Take out the basket, tray, and/or pan. Soak them in warm, soapy water for 15–20 minutes to loosen grease and stuck-on food.
-
Pro Tip: Add a tablespoon of baking soda to the soak water for extra degreasing power.
Step 3: Clean the Basket and Tray
After soaking, use a non-abrasive sponge or brush to scrub the surfaces gently.
-
Tough stains? Sprinkle baking soda directly on the spot and scrub in circular motions with a damp sponge.
-
Use a soft toothbrush for hard-to-reach crevices and mesh baskets.
Rinse thoroughly and let them air dry, or towel-dry them.
Step 4: Wipe Down the Interior
Using a damp microfiber cloth or sponge with a little dish soap, wipe the inside of the air fryer body.
-
Avoid getting water on the heating element or electrical parts.
-
Use a dry brush or cloth to remove debris near the coil.
If there’s stubborn gunk stuck near the coil, dampen a cloth with white vinegar and gently wipe.
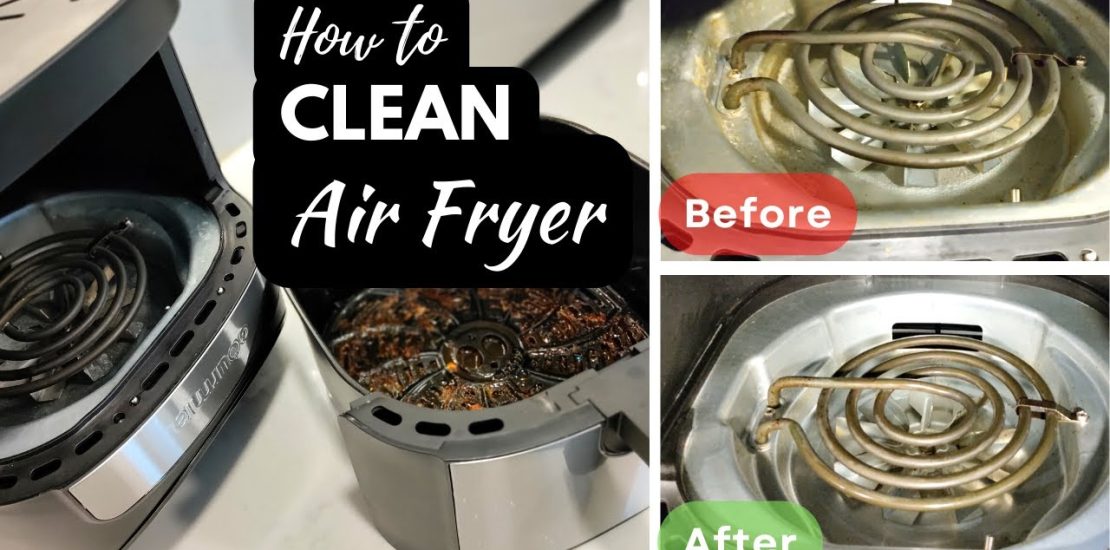
Step 5: Clean the Heating Element
Turn the unit upside down carefully or tilt it to access the heating coil. Wipe gently using:
-
A damp cloth with vinegar
-
Or a soft brush if debris is crusted on
⚠️ Be very gentle with the heating coil; it’s sensitive and essential for function.
Step 6: Wipe the Exterior
Use a slightly damp microfiber cloth with dish soap to clean the exterior casing and control panel. Immediately wipe again with a dry cloth to avoid moisture damage.
Step 7: Reassemble and Store
Once all parts are completely dry, reassemble the air fryer. Make sure everything is fitted correctly and there’s no moisture trapped in the unit.
Section 5: How Often Should You Clean Your Air Fryer?
-
After Every Use:
-
Empty and wipe the basket and tray.
-
Clean grease and crumbs immediately to prevent buildup.
-
-
Once a Week (if used frequently):
-
Deep clean the basket, pan, and interior.
-
-
Once a Month:
-
Inspect and clean the heating coil and fan area.
-
Section 6: Dealing with Common Air Fryer Cleaning Issues
1. Grease Buildup That Won’t Budge
Make a paste of baking soda + water, apply to greasy areas, and let sit for 10 minutes before scrubbing.
2. Persistent Odors
Wipe interior with a cloth soaked in a mixture of equal parts vinegar and water. Then leave the basket in the sun for a few hours.
3. Burnt Food Bits in the Basket
Use a wooden spoon or silicone spatula to scrape gently. Soaking and then scrubbing with a brush usually solves this.
4. White Residue (from hard water)
Mix white vinegar with water (1:1), wipe affected areas, and dry with a clean cloth.
Section 7: Can You Put Air Fryer Parts in the Dishwasher?
Check your manufacturer’s instructions — many air fryer baskets and trays are labeled dishwasher-safe.
However, to preserve the non-stick coating:
-
Handwashing is preferred, especially for frequent users.
-
Never put electrical components (like the base unit) in water or dishwasher.
Section 8: Maintenance Tips to Keep Your Air Fryer Cleaner for Longer
✅ Use Parchment Paper Liners
These catch crumbs and grease, reducing mess.
✅ Don’t Overcrowd the Basket
Crowded food means more dripping and splatter.
✅ Shake the Basket Halfway Through Cooking
This helps prevent sticking and makes cleaning easier.
✅ Empty Grease Immediately After Use
Once cooled, pour out residual grease instead of letting it solidify.
✅ Wipe After Every Use
Even a quick wipe keeps your air fryer in top shape.
Section 9: Natural Cleaning Recipe for Air Fryer Deodorizer
If your air fryer smells bad even after cleaning, try this natural deodorizer:
Ingredients:
-
½ cup white vinegar
-
½ lemon, juiced
-
1 cup water
Instructions:
-
Mix all in a small oven-safe bowl.
-
Place the bowl in the air fryer basket.
-
Set to 180°C (350°F) and let run for 3–5 minutes.
-
Turn off and let sit for 10 more minutes before removing the bowl.
This process helps neutralize lingering odors and refreshes the interior.
Section 10: What NOT to Do When Cleaning an Air Fryer
-
❌ Don’t immerse the main unit in water
-
❌ Don’t use metal utensils or steel wool
-
❌ Don’t leave grease or crumbs for days
-
❌ Don’t use harsh chemicals (like oven cleaner)
-
❌ Don’t try to disassemble electric parts unless authorized
Conclusion
Keeping your air fryer clean is not just about appearances — it’s crucial for safe cooking, better-tasting food, and a longer appliance life. With just a few minutes of maintenance after each use and a deeper clean once in a while, you can ensure your air fryer performs like new for years to come.
This guide gave you everything you need to confidently clean each part of your air fryer, troubleshoot sticky issues, and prevent future buildup. From daily wipe-downs to monthly coil checkups, the secret to a pristine air fryer lies in consistency and care.
So next time you whip up a batch of golden fries or juicy chicken thighs, you’ll do so knowing your trusty air fryer is clean, safe, and ready for action. Happy air frying!